How to Animate a Basic Walk Cycle for Games

A walk cycle is a short series of frames showing a character taking two steps – one with each foot – that loops seamlessly, so the character appears to walk continuously. In games, walk cycles are among the most important animations, because players watch their character walk for hours. A basic walk cycle is built from four key poses: contact, down, passing and up.

Walk cycles use the timing and spacing skills from Persistence of Vision, Simple 2D Movement and the Bouncing Ball Timing Exercise – in fact, the body’s up-and-down motion behaves a bit like a gentle bouncing ball.

The four key poses

PoseWhat happensTips
ContactThe front heel touches the ground and the back toe is about to leave it. The legs are furthest apart.This pose shows the stride length. Arms are opposite to legs: left leg forward, right arm forward.
DownThe front leg bends to absorb the weight; the body is at its lowest point.Shows weight. A heavy character sinks more.
PassingThe back leg swings past the standing leg; the body rises through the middle.The free foot lifts to clear the ground.
UpThe standing leg pushes up onto the toe; the body is at its highest point.Leads into the next contact with the other foot.

After the four poses for one step, the same poses are repeated with the opposite leg and arm to complete the cycle. The last frame must lead smoothly back into the first so the loop has no jump.

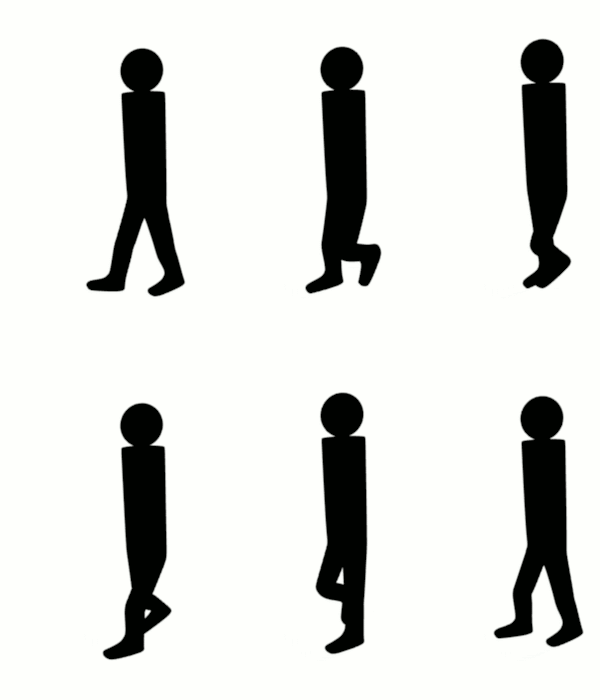
Animated black-and-white cartoon character walking in profile
Figure 1 – A simple four-frame walk cycle in profile. Even with very few drawings, the loop reads clearly as walking. Image: Ajay Karat, CC BY 3.0, via Wikimedia Commons.

Timing a walk

  • At 24 fps, a normal walk takes about 12 frames per step (24 frames for the full cycle), which is roughly two steps per second.
  • A quick, cheerful walk might use 8 frames per step; a slow, tired walk 16 or more.
  • Game sprites often use 4, 6 or 8 frames for the whole cycle to save art time and memory.
  • Personality comes from variation: a bouncy walk has big up-and-down motion; a sneaky walk is low with slow, careful steps; a proud walk leads with the chest.

Other body parts

  • Hips rise and fall (lowest on the down pose, highest on the up pose) and tilt slightly from side to side.
  • Shoulders twist opposite to the hips.
  • Arms swing opposite to the legs, following arcs, with a slight delay (follow-through).
  • Head bobs with the body; hair, clothes and tails trail behind (overlapping action).
Animated black silhouette of a figure walking in a steady loop
Figure 2 – A 3D walk cycle created in Blender. The same four key poses and timing apply whether you draw by hand or animate a 3D rig. Image: SoylentGreen, CC BY-SA 3.0, via Wikimedia Commons.

Walk cycles in games

Game walk cycles have a few special requirements:

  • In-place animation: the character walks on the spot, and the game code moves it through the world. The animation speed must match the movement speed, or feet appear to slide.
  • Root motion: in some 3D engines, the animation itself moves the character, keeping feet planted perfectly.
  • Sprite sheets: 2D frames are arranged in a grid image that the engine plays in order.
  • Transitions and blending: the walk must blend smoothly into idle, run and jump animations. Engines use state machines to switch between them.
  • Directions: top-down and isometric games need walk cycles for four or eight directions.

In this project from the Scratch Team, a sprite switches through walking costumes in a loop. Click “See inside” to see how the cycle and the movement are coded, then remix it with your own drawings:

Alan Becker’s tutorial breaks down walk cycles pose by pose:

Common walk cycle mistakes

  • Arms and legs on the same side moving together. Remember: left leg forward means right arm forward.
  • No up-and-down motion. Without the down and up poses, the character glides like it is on wheels.
  • A “pop” at the loop point. The last frame should be one step before the first frame, not a copy of it, or the loop will stutter.
  • Feet sliding. The planted foot should stay fixed to the ground while the body moves over it.
  • Stiff arms. Let the elbows bend slightly and the hands trail behind on arcs.

Example

For a side-scrolling game, a student animates an 8-frame walk cycle for a young fisher character: frame 1 contact (left foot forward), frame 2 down, frame 3 passing, frame 4 up, then frames 5–8 repeat the poses with the right foot forward. He exports the frames as a sprite sheet, sets the animation to play at 10 frames per second, and adjusts the character’s movement speed in the game until the feet no longer slide across the boardwalk. To show personality, he adds a slight bounce and lets her fishing hat bob one frame behind the head.

Exercise

  1. Draw the four key poses (contact, down, passing, up) for one step in profile, using stick figures or a simple character.
  2. Complete an 8- or 12-frame walk cycle that loops smoothly. Check it with onion skinning.
  3. Animate two walks with different personalities (for example happy and tired). Describe how you changed timing and poses.
  4. Put your walk cycle into Scratch or a game engine and match the movement speed so the feet do not slide.

Next: Stop-Motion Animation: Wire Bending, Armatures and Building Models for Scenes

Syllabus link: This post is relevant to the CAPE® Animation and Game Design Syllabus, Unit 2: Interactive Design and Game Development, Module 3: Animation for Games – Specific Objective 10 (“create basic walk cycles”).

Attributions to media used in this post:

4-frame-walk-cycle.gif – Ajay Karat – CC BY 3.0 (via Wikimedia Commons)

Blender3D NormalWalkCycle.gif – SoylentGreen – CC BY-SA 3.0 (via Wikimedia Commons)

© 2026 Vedesh Kungebeharry. All rights reserved.

Game Design Tools, Making Your First Game and the Constraints of Budget, Time and Audience

Game design tools are the software programs used to build games, from beginner-friendly block-based editors to professional game engines. Using a tool to create a game means combining a game environment, characters, assets, behaviours, sound and scores into something playable. Every project also faces constraints – limits of budget, time and audience – that shape what can be made.

Prominent game design tools

ToolTypeBest forCost
ScratchBlock-based coding in the browserBeginners, quick 2D prototypes, learning logicFree
StencylDrag-and-drop blocks for 2D gamesBeginners making mobile and web gamesFree tier, paid publishing
Construct (Construct 2 / 3)Event-sheet 2D engine in the browserFast 2D games without traditional codingFree trial, subscription
GameMaker2D engine with visual scripting and its own language (GML)Indie 2D gamesFree for non-commercial use, paid licences
UnityProfessional 2D and 3D engine (C#)Mobile, PC, console, VRFree personal plan, paid tiers
Unreal EngineProfessional 3D engine (C++ and Blueprints visual scripting)High-end 3D, film and virtual productionFree to start, royalties on large earnings
GodotOpen-source 2D and 3D engine (GDScript, C#)Students and indies who want a free, lightweight engineFree and open-source
Screenshot of the Scratch editor showing coloured code blocks, a script area and a stage with a cat sprite
Figure 1 – The Scratch 3.0 editor: code blocks on the left, the scripts area in the middle, and the stage and sprite list on the right. Image: Rchoffat (Scratch interface © MIT Media Lab), CC BY-SA 4.0, via Wikimedia Commons.
Screenshot of the Godot game engine editor with a 2D scene and panels of settings
Figure 2 – The Godot engine editor. Professional engines have scene trees, property inspectors and code editors, but the same ideas – scenes, objects and behaviours – apply. Image: AfterCadaver, CC BY-SA 4.0, via Wikimedia Commons.

Pricing and licences change often, so always check each tool’s website before starting a project.

Using a game design tool to create a game

Whatever tool you use, a game is built from the same six parts. Here is how they look in Scratch:

  1. Game environment: choose or paint a backdrop for each level or screen.
  2. Characters: add sprites for the player, enemies and helpers, each with several costumes for animation.
  3. Assets: import or draw the images, sounds and fonts the game needs (use your own or openly licensed assets and credit them).
  4. Behaviours: write scripts for each sprite: “when right arrow pressed, change x by 5”; “if touching wall, go back”; “forever glide randomly”.
  5. Sound: add background music with a loop and sound effects for jumping, collecting and winning.
  6. Scores: create a variable called Score, set it to 0 when the green flag is clicked and change it by 1 when the player collects something. Add a timer or lives for extra challenge.

Try the Scratch Team’s Maze Starter, then click “See inside” to find each of the six parts. Remix it to add a score and a second level:

The official Scratch Team tutorial below builds a complete jumping game step by step – a perfect first project:

Constraints on game design

Budget

Money decides the size of the team, the number of assets, the tools and licences, marketing and the platforms you can release on. A low budget means a smaller scope: fewer levels, simpler art styles (pixel art or flat shapes), free tools such as Godot or Scratch, and openly licensed sound.

Time

Deadlines limit how many features can be built and tested. Teams use milestones and cut features that are not essential (“scope creep” – adding more and more features – is one of the main reasons games are late). A 48-hour game jam forces a one-mechanic game; a two-year project can support a full story.

Audience

The audience shapes nearly every design decision. For example, if pre-schoolers are the audience, the game should use bright colours, large simple shapes, spoken instructions instead of text, gentle or no failure, and no advertising or purchases. For teenagers, deeper mechanics, customisation and social features may matter more. The platform your audience owns (cheap phones, school computers, consoles) also limits the graphics and controls.

Example

A student team has two weeks, no budget and a target audience of 6- to 8-year-olds at a local primary school. They choose Scratch (free, runs on school laptops). Their game, Recycle Rush, has one environment (a park backdrop), three characters (a child, a recycling bin, a litter-dropping pigeon), simple drawn assets, behaviours (the bin follows the mouse; litter falls from the pigeon), cheerful looping music with a “ding” for each catch, and a score that counts recycled items. Because of the audience, they use big bright shapes and voice recordings for instructions; because of the time limit, they cut a planned second level and a shop.

Exercise

  1. Compare three game design tools from the table: which would you choose for a first 2D game, and why?
  2. Build a simple game in Scratch (or another tool) that includes all six parts: environment, characters, assets, behaviours, sound and a score.
  3. Write a short “constraints statement” for your game: budget, time and audience, and one design decision each constraint forced you to make.
  4. Change the audience of your game to pre-schoolers or to adults. List five changes you would make.

Next: How to Design a One-Level Game Interface and Navigation Tools (HUD, Menus and Maps)

Syllabus link: This post is relevant to the CAPE® Animation and Game Design Syllabus, Unit 2: Interactive Design and Game Development, Module 2: Game Design and Development – Specific Objective 17 (“identify prominent game design tools”); Specific Objective 18 (“use a game design tool to create a game”); Specific Objective 19 (“discuss the constraints on game design”).

Attributions to media used in this post:

Interface de Scratch 3.0.png – Rchoffat (Scratch interface © MIT Media Lab) – CC BY-SA 4.0 (via Wikimedia Commons)

Godot 3.1 screenshot.png – AfterCadaver – CC BY-SA 4.0 (via Wikimedia Commons)

© 2026 Vedesh Kungebeharry. All rights reserved.

Game Mechanics Explained: Rules, Players, Avatars, Game State, Game Views and Goals

Game mechanics are the rules and procedures that make a game work: what players can do, what the game does in response, and how someone wins or loses. When designers formulate the mechanics of a game, they define five things: the rules, the players, the avatars they control, the game state and the game views. They also plan goals, both short-term (collect this coin) and long-term (win the race).

In the previous lesson, Iterative Design in Games, we saw that mechanics are tested and revised again and again. Here we learn how to write them clearly in the first place.

Common mechanics found in most games

Common mechanicQuestion it answersExample (a racing game)
SetupHow does the game begin?Four karts line up on the start grid; each player picks a character and a track.
Victory conditionsHow does someone win (or lose)?The first to finish three laps wins.
Progression of playHow does the game move forward?Players race in real time; laps are counted; new tracks unlock after each cup.
Player actionsWhat can the player do?Accelerate, brake, steer, drift and use a collected item.
Definition of game viewsWhat does the player see?A third-person camera behind the kart plus a mini-map; split-screen for local multiplayer.
A screen divided into four views, each showing a different kart racing on the same track
Figure 1 – Four-player split-screen in SuperTuxKart. The game view is part of the mechanics: each player gets their own camera on a shared screen. Image: QwertyChouskie, CC BY-SA 4.0, via Wikimedia Commons.

Formulating the mechanics: the five parts

1. Rules

Rules define what is allowed, what is not, and what happens as a result. Good rules are clear, consistent and testable. Write them as short “if… then…” statements: If the ball touches the paddle, then it bounces and the score increases by one.

2. Players

Decide how many players there are and how they relate: single-player against the game, player versus player, cooperative, team versus team, or many players online. The same rules feel completely different when played together or against each other.

3. Avatars

An avatar is the character or object that represents the player: a hero, a car, a paddle, even a cursor. Define what the avatar can do (its abilities), how fast it moves, and what happens when it is hit or helped.

4. Game state

The game state is a snapshot of everything that matters at one moment: scores, lives, positions, time left, items held, which doors are open. When you save a game, you save its state. In programming, game state is stored in variables, and every rule either reads or changes those variables.

5. Game views

Game views define how the game world is shown: the camera angle, how much of the world is visible and what information appears on the HUD. Views are covered in detail later in this module.

Short-term and long-term goals

Goals give players a reason to act. Short-term goals can be completed in seconds or minutes: collect a coin, jump a gap, beat one enemy. Long-term goals take a whole level, session or game: win the race, finish the story, complete the collection. Good games layer them, so there is always something to do right now and a bigger reason to keep going. Many games also have medium-term goals, such as finishing a level or upgrading a tool.

Black-and-white pixel art platformer level with platforms, ladders and a small character
Figure 2 – A simple platformer level. Short-term goals (reach the next platform, grab the item) build towards the long-term goal of reaching the exit. Image: Kenney (kenney.nl), CC0, via Wikimedia Commons.

Try the Scratch Team’s Pong Starter below. Look for its rules, its avatar (the paddle), its game state (the score) and its goals, then click “See inside” to see how the mechanics are built with code blocks.

Some mechanics are hidden: games quietly help players to make play feel fair and exciting. Extra Credits explains these “hidden mechanics”:

Example

Here are the formulated mechanics for a one-screen game called Coconut Catch:

  • Players: one player against the game.
  • Avatar: a basket that moves left and right along the bottom of the screen at a fixed speed.
  • Setup: the score is 0, lives are 3, the timer is 60 seconds, and the basket starts in the centre.
  • Rules: coconuts fall from random positions; if a coconut touches the basket, score +1; if a coconut hits the ground, lives −1; every 10 points, coconuts fall faster; a golden coconut is worth 5.
  • Game state: score, lives, time left, fall speed and the position of each coconut.
  • Victory conditions: the player wins by reaching 30 points before time runs out; the game ends if lives reach 0.
  • Game view: a static side view of a beach with the score, lives and timer at the top.
  • Goals: short-term – catch the next coconut; long-term – reach 30 points and beat your high score.

Exercise

  1. Choose a game you know and describe its setup, victory conditions, progression of play, player actions and game views.
  2. List three short-term and two long-term goals from any game. Explain how the short-term goals help players reach the long-term goals.
  3. Formulate the full mechanics (rules, players, avatars, game state, game views) for your own simple game, using the Coconut Catch example as a model.
  4. Remix the Pong Starter project: add one new rule and one new variable to the game state, then describe how they change the play.

Next: Types of Stories in Games: Linear, Branching, Open-Ended, Instanced, Emergent, Thematic and Algorithmic

Syllabus link: This post is relevant to the CAPE® Animation and Game Design Syllabus, Unit 2: Interactive Design and Game Development, Module 2: Game Design and Development – Specific Objective 7 (“identify some common mechanics used in games”); Specific Objective 8 (“formulate the mechanics for a game”); Specific Objective 9 (“distinguish between short term and long term goals for games”).

Attributions to media used in this post:

Split-screen 4-player multiplayer in SuperTuxKart (2017, 0.9.3).png – QwertyChouskie – CC BY-SA 4.0 (via Wikimedia Commons)

1-bit platformer sample.png – Kenney (kenney.nl) – CC0 (via Wikimedia Commons)

© 2026 Vedesh Kungebeharry. All rights reserved.

What Is a Level in Game Design? Structuring Gameplay and Outlining Your First Three Levels

In game design, a level is a section of a game with its own space, challenges and goal. The player must complete one level to move on to the next. Level design is the job of planning each level: its layout, obstacles, enemies, rewards and difficulty, so that the game gets more interesting as the player improves.

What is a level?

A level usually has:

  • A start and an end (or goal), such as reaching a door, collecting all the coins or defeating a boss.
  • An environment – the place where the level happens, such as a beach, a cave or a space station.
  • Challenges – enemies, gaps, puzzles or time limits.
  • Rewards – points, new abilities, story scenes or simply the next level.
Sample 2D platformer level with platforms, ladders and spikes
Figure 1 – A sample platform game level made with free (CC0) game assets. You can see platforms, hazards and collectables arranged into a path.

Structuring the gameplay

Good levels are carefully ordered. Designers think about:

  • Teaching – introduce one new idea (a mechanic) at a time, in a safe place, so the player can learn it without being punished.
  • Difficulty curve – make each level a little harder than the last, with some easier moments to rest.
  • Pacing – mix fast, exciting moments with slower moments of exploring.
  • Guiding the player – use light, colour, paths and collectables to show where to go.
  • Checkpoints – places where progress is saved, so a mistake does not send the player all the way back.
  • Variety – change the setting, music, enemies or type of challenge from level to level so the game does not feel repetitive.

Many designers first sketch a level on paper or build a quick blockout in a level editor, then playtest it and improve it.

Screenshot of the Tiled map editor with a tile-based terrain map
Figure 2 – The free, open-source Tiled map editor, one of many tools used to lay out 2D game levels from tiles.

Ways of dividing a game

Not every game calls its sections “levels”. Common terms include:

TermMeaningWhere you might see it
LevelA single stage with a start, challenges and a goal.Platform and puzzle games
MissionA task with specific objectives, often with a briefing before it.Action, strategy and racing games
QuestA task given by a character, often with a story reason. Games can have a main quest and side quests.Role-playing and adventure games
EpisodeA part of the game released or played as one instalment, like a TV episode.Story-driven and episodic games
WorldA group of levels that share a theme or setting, such as an ice world.Platform games
ChapterA section of the story, like a chapter in a book.Story and adventure games

Outlining the first three levels

The first three levels are especially important because they teach the player how to play and convince them to keep going. A simple outline for each level should state the setting, the goal, the new mechanic or challenge and how it ends.

Example

Game idea: Reef Rescue, a 2D game where a young turtle cleans plastic from a coral reef.

  1. Level 1 – Shallow Lagoon (tutorial): Goal: collect 10 pieces of plastic. New mechanic: swimming and collecting. No enemies. Ends when the turtle reaches the reef gate.
  2. Level 2 – Seagrass Maze: Goal: collect 20 pieces and find the exit. New challenge: slow-moving jellyfish to avoid, and a checkpoint halfway.
  3. Level 3 – Coral Canyon: Goal: free three trapped fish from nets. New mechanic: a dash move to break nets. Combines everything learned, then ends with a mini-boss: a runaway fishing net.

Together these three levels could form World 1 of the game. Try the Scratch project below, a scrolling platformer with three levels. Notice what changes from one level to the next:

Watch the video below to see how one famous series introduces and develops a new idea in every level:

Exercise

  1. In your own words, define a level in game design.
  2. Explain the difference between a mission, a quest and a world.
  3. Choose a game idea of your own. Outline its first three levels, giving the setting, goal, new mechanic or challenge, and ending for each.
  4. Sketch a top-down or side-view map of Level 1 on paper. Mark the start, the goal, one checkpoint and the place where the new mechanic is taught.

Next: Folklore, Culture and Heritage in Animation and Game Design (With Caribbean Examples)

Syllabus link: This post is relevant to the CAPE® Animation and Game Design Syllabus, Unit 1: Fundamentals of Animation and Game Design, Module 2: Drawing and Layout – Specific Objective 5 (“define the concept of a level in game design”); Specific Objective 6 (“outline the first three levels of a game”).

Attributions to media used in this post:

1-bit platformer sample.png – Kenney (kenney.nl) – CC0 (via Wikimedia Commons)

Tiled-screenshot-terrain.png – Thorbjørn Lindeijer – CC BY-SA 3.0 (via Wikimedia Commons)

© 2026 Vedesh Kungebeharry. All rights reserved.

Layers of an Environment and Perspective Drawing: Foreground, Midground, Background and 1-, 2- and 3-Point Perspective

Every scene in an animation or game takes place in an environment: the world around the characters. To make a flat screen feel deep, artists split the environment into layers and draw it using perspective, a set of rules that makes objects look smaller and closer together as they get further away.

The layers of an environment

Most scenes can be split into three main layers:

  • Foreground – the layer closest to the viewer. It may hold grass, rocks, railings or branches that frame the scene. Objects here are large and detailed.
  • Midground (middle ground) – where the main action usually happens. Characters, platforms and important props are often placed here.
  • Background – the layer furthest away, such as the sky, mountains, the sea or a city skyline. It sets the location and mood but has less detail.

Artists show depth between the layers by using overlap (near objects cover far ones), size (far objects are smaller), detail (far objects are simpler) and atmospheric perspective (far objects look lighter, bluer and have less contrast).

Parallax scrolling

In 2D games and animations, the layers are often drawn separately and moved at different speeds. The background moves slowly and the foreground moves quickly, which makes the scene feel three-dimensional. This is called parallax scrolling.

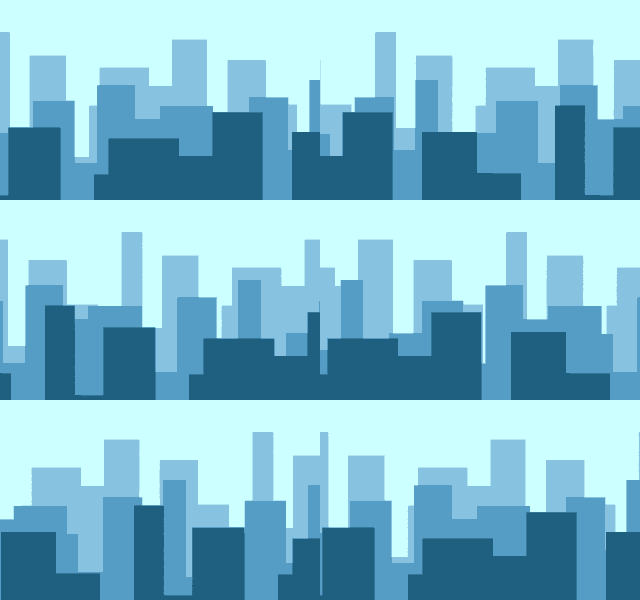
Animated city skyline with three layers scrolling at different speeds
Figure 1 – Parallax scrolling with three 2D layers. The nearest layer moves fastest and the furthest layer moves slowest.

Try the Scratch project below. Use the arrow keys and watch how the layers move at different speeds:

Observational drawing

Observational drawing means drawing what you actually see in front of you – a street, a classroom, a still life of objects on a table – rather than what you think things look like. It trains your eye to notice shapes, proportions, light and shadow. Environment artists often sketch real places first and then change them to fit an animated or game world.

Perspective drawing

Linear perspective uses a few key terms:

  • Horizon line (eye level) – a horizontal line across the picture at the height of the viewer’s eyes.
  • Vanishing point – a point where parallel lines (such as the two edges of a road) appear to meet.
  • Orthogonal lines – lines that run from the corners of objects towards a vanishing point.

One-point perspective

One-point perspective has a single vanishing point on the horizon line. It is used when you look straight down a road, a corridor, a railway line or a room. Fronts of objects face you as flat shapes, while their sides go back to the one point.

Labelled diagram of one-point perspective with boxes
Figure 2 – One-point perspective: the horizon line, the single vanishing point and the orthogonal lines.

Two-point perspective

Two-point perspective has two vanishing points, one on each side of the horizon line. It is used when you look at the corner of an object, such as a building on a street corner. Vertical lines stay vertical.

Diagram of a building drawn in two-point perspective
Figure 3 – Two-point perspective: the sides of the building go back towards two vanishing points on the horizon line.

Three-point perspective

Three-point perspective adds a third vanishing point above or below the horizon line. It is used for dramatic views, such as looking up at a tall tower (a “worm’s-eye view”) or down from a rooftop (a “bird’s-eye view”). Game and film artists use it to make things look huge or dizzying.

Cube drawn in three-point perspective
Figure 4 – A cube in three-point perspective: even the vertical edges lean towards a third vanishing point.

Example

Imagine a side-scrolling game set in a fishing village at sunset:

  • Foreground: a wooden jetty post and some fishing nets that pass quickly across the screen.
  • Midground: the beach and boats where the player runs and jumps.
  • Background: the sea, distant hills and an orange sky, drawn lighter and with less detail, moving slowly.

For the village’s title screen you could draw the main street in one-point perspective, with the vanishing point where the street meets the sea.

Watch the video below to see how games use parallax layers to create depth:

Exercise

  1. Name the three layers of an environment and describe what might be found in each layer of a forest scene.
  2. Do an observational drawing of a corridor or road using one-point perspective. Mark the horizon line and vanishing point.
  3. Draw a simple building on a street corner in two-point perspective.
  4. Draw a tall tower from a worm’s-eye view using three-point perspective.

Next: Colour Theory, Texture, Composition and Layout for Animation and Game Scenes

Syllabus link: This post is relevant to the CAPE® Animation and Game Design Syllabus, Unit 1: Fundamentals of Animation and Game Design, Module 2: Drawing and Layout – Specific Objective 3 (“identify layers of an environment”); Specific Objective 4 (“apply knowledge of design principles for environmental design”).

Attributions to media used in this post:

Parallax scroll.gif – NuclearDuckie – CC0 (via Wikimedia Commons)

One Point Perspective Example.jpg – Maura Valentino – CC BY 4.0 (via Wikimedia Commons)

TwoPointPerspective.png – Mmroberts – CC BY 3.0 (via Wikimedia Commons)

Perspective cube.png – MrNoble.xyz – CC0 (via Wikimedia Commons)

© 2026 Vedesh Kungebeharry. All rights reserved.

What Is Animation? What Is Game Design? Key Terms for Beginners

Animation is the process of making still images appear to move. A series of pictures (called frames), each slightly different from the one before, is shown one after the other very quickly. Our eyes and brain blend the pictures together and we see motion.

Game design is the art of planning how a game works. It covers the goals, rules and challenges that players face, so that playing the game is fun, interesting or useful.

In this post we will look at both ideas and some of the key terms you will meet when you start learning animation and game design.

What is animation?

Every animation, from a pencil flip book to a big-budget 3D movie, works on the same idea: show a sequence of images fast enough and they look like one moving picture.

The number of images shown each second is called the frame rate. It is measured in frames per second (fps). Film has traditionally used 24 frames per second. Many video games aim for 30 or 60 frames per second so that movement looks smooth.

Early kineograph flip book
Figure 1 – An early kineograph (flip book). Flipping the pages quickly makes the pictures appear to move.
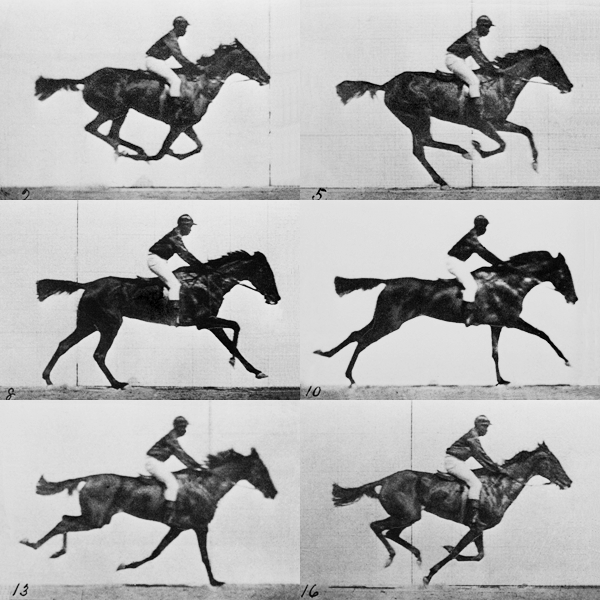
Animated sequence of a galloping race horse
Figure 2 – Photographs of a galloping horse taken by Eadweard Muybridge (published 1887), played one after the other as an animation.

Common types of animation

  • 2D animation – flat drawings that move up, down, left and right. It can be drawn by hand or created on a computer.
  • 3D animation – characters and objects are built as 3D models in a virtual world, then “filmed” with a virtual camera and rendered into frames.
  • Stop-motion animation – real objects (for example clay figures or puppets) are moved a tiny bit and photographed one frame at a time.
  • Motion graphics – animated text, shapes and logos, often used in adverts, title sequences and explainer videos.

What is game design?

A game designer decides what the player does and why. For example: What is the goal? What are the rules? How does the player win or lose? How hard should it be? What choices does the player get?

Game design is not the same as programming. A programmer writes the code that makes the game run. A game designer plans the experience. On a small team, one person may do both jobs. Game design also applies to board games, card games and sports, not just video games.

Other key terms in animation and game design

TermMeaning
FrameOne single image in an animation.
Frame rate (fps)How many frames are shown every second.
KeyframeAn important frame that marks the start or end of a movement. The animator sets the keyframes first.
In-betweens (tweening)The frames between two keyframes that make the movement smooth. Software can often create these automatically.
StoryboardA sequence of drawings, usually with notes and dialogue, that plans the shots of an animation or video.
CharacterA fictional person, animal or creature in a story, animation or game.
SpriteA 2D image or character that can be moved around the screen in a game.
AvatarAn icon or figure that represents a player in a game.
EnvironmentThe surroundings (world, level or scene) where the characters exist.
Game mechanicsThe rules and actions that make a game work, for example jumping, collecting coins or scoring points.
Game engineThe core software a game runs on. It handles things like graphics, physics and sound.
PlatformThe device or system a game is played on, for example a PC, a console or a mobile phone.
PrototypeAn early playable version of a game (or part of a game) used to test ideas.
PlaytestTesting a game with real players to find bugs and design problems.
GenreA category of game or animation, for example puzzle, action or role-play game.
Animated ball moving along an arc while changing colour
Figure 3 – Tweening: the software creates the in-between frames that move the ball along its path and change its colour from one keyframe to the next.
Animated walking character sprite
Figure 4 – An animated game sprite: a character walking, made from a sequence of frames played in a loop.

Example: animation and game design in Scratch

If you have used Scratch, you have already done both! When a sprite switches between costumes inside a loop, each costume is a frame, and the wait time controls the frame rate. See: NCSE ICT – Scratch Programming – Animating Sprites using loops and the Broadcast system.

When you decide that touching an enemy ends the game, or that collecting a star adds 10 points, you are doing game design. A full example is in A simple game!

Exercise

  1. Make a flip book with at least 12 pages in the corner of a notebook. Draw a ball that falls and bounces. Flip it quickly and watch it move.
  2. In your own words, explain the difference between a frame and the frame rate.
  3. Choose a game you know well (video game, board game or sport). Write down its goal, three of its rules and the platform it is played on.
  4. Explain the difference between a game designer and a game programmer.

Next: History of Animation and Video Games – From Flip Books to Virtual Reality

Syllabus link: This post is relevant to the CAPE® Animation and Game Design Syllabus, Unit 1: Fundamentals of Animation and Game Design, Module 1: Understanding Animation and Game Design – Specific Objective 1 (“define terms associated with animation and game design”).

Attributions to media used in this post:

Linnet kineograph 1886.jpg – John Barnes Linnet – Public domain (via Wikimedia Commons)

Muybridge race horse animated.gif – Eadweard Muybridge – Public domain (via Wikimedia Commons)

Tweening.gif – Oicumayberight (author assumed on Commons) – Public domain (via Wikimedia Commons)

Barbarian Forward Walk.gif – Kurt Kaiser – CC0 (via Wikimedia Commons)

© 2026 Vedesh Kungebeharry. All rights reserved.
NCSE ICT – Scratch Programming – Manipulating sprites

Tutorial using scratch cards

Follow the tutorials in this pdf document (scratch2cards_jan2013.pdf)

https://drive.google.com/file/d/1sG6pRMYRAmM5VP4WOSeYXAtWm81Ietdo/view?usp=share_link

The above file and 2 others are in the following google drive folders for your reference:

https://drive.google.com/drive/folders/1-OElNjqODc1RVdUFGVe1LXuR6kJYAE_D?usp=share_link

Changing color

Color Example 1

Color Example 2


Credit: The following section was taken from : https://en.scratch-wiki.info/wiki/Graphic_Effect#Color

Color

One costume can take on 200 different color-schemes using the color effect. The “real” effect of the color is equal to the numeric/stored effect modulo 200. This means that changecoloreffectby200 will do nothing since the rendered color will be the same.

“Change color effect” will have a little apparent effect on sprites colored black, as black is a desaturated color rather than its own hue. To see the color effect on a black sprite, increase its brightness first. Similarly, sprites colored white will have little noticeable effect when the “Change color effect” block is used.

Changing of colors using the Color Effect block

These are the color changes from Scratch Cat Orange (0 Color Effect) to itself when it restarts at the 200th positive value of the color effect.

  • 1-10 = Orange to light yellow
  • 10-20 = Light yellow to a yellowish-green
  • 20-30 = Yellowish-green to a medium green color
  • 30-40 = Medium green to a thick, green color.
  • 40-50 = No considerate change.
  • 50-60 = A greenish-light cyan color.
  • 60-70 = A lightly-blue tinted green to a fully light cyan color.
  • 70-80 = A light cyan color to a light blue color.
  • 80-90 = A light blue to a medium-dark blue.
  • 90-100 = A medium-dark blue a thick dark blue.
  • 100-110 = Darker and darker blue.
  • 110-120 = A slowly more purplish-blue.
  • 120-135 = Violet to Indigo
  • 135-160 = A gradually mixed pink and purple.
  • 160-170 = A gradually pinkish-red color.
  • 170-180 = A thick red color.
  • 180-190 = A dark orange color
  • 190-200 = Identical to the original color at this point.

For other colors, simply start at the most similar color effect. If you are still not sure, try changing the color effect until it matches one of these descriptions.

Credit: The above section was taken from : https://en.scratch-wiki.info/wiki/Graphic_Effect#Color


Moving a sprite to music (By changing costumes)

To accomplish this, we set up a scenario where:

  1. Music is played in the background
  2. We cycle through a sprite’s costumes using a forever block

See: Moving a sprite to music (By changing costumes) example. Make sure to investigate the sound tab to see how sounds are imported and used.


Credit: The section below was taken from: https://en.scratch-wiki.info/wiki/Costume#Uses Be sure to follow the link to view additional examples of how this block can be used

Blocks

There are four blocks that relate to costumes, which are as follows:

The first three blocks can be located in the Looks block section, while the fourth can be found in the Sensing block area.

Uses

  • The first block is used for the sprite to transfer its look between any of its costumes.
  • The second block is mainly used in animation. A block that does the opposite has been suggested, but it can simply be done with the following code:
switchcostumetocostume#-1
  • The third block contains the number of the current costume being used. It can be read through other blocks, and specific actions can be taken.
  • The fourth block contains two drop-down boxes. The first allows you to read a sprite’s X Position, Y Position, direction, costume number, size, and volume; while it can also read the Stage‘s background number and volume.

This block can be read from the Stage and all sprites.

Credit: The section above was taken from: https://en.scratch-wiki.info/wiki/Costume#Uses Be sure to follow the link to view additional examples of how this block can be used


Moving a sprite with the keyboard

See the link https://islandclass.org/2021/01/13/making-a-sprite-jump-in-scratch/

Talking Sprites

We can use the “Say” block to make sprites talk. See the tutorial below for more detail:

Tutorial: https://scratch.mit.edu/projects/editor/?tutorial=tell-a-story

Exercises in scratch cards: https://resources.scratch.mit.edu/www/cards/en/story-cards.pdf


Credit: the following section was taken from: https://en.scratch-wiki.info/wiki/Say_()for()Seconds(block). Be sure to follow the link to view additional examples of how this block can be used

Say () for () Seconds (block)

“Say” redirects here. For the other say block, see Say () (block).

Say () for () Seconds
sayforseconds
CategoryLooks
TypeStack
Introduced in1.0

The Scratch Cat saying “Hello!” with the Say block

The say () for () seconds block is a looks block and a stack block. The block displays a speech bubble with the specified text for the sprite that runs it, which appears on the screen for the specified amount of seconds.

The block is similar to the think () for () seconds block, with the difference being that this block displays a speech bubble, while the other displays a thought bubble. It is also similar to the say () block, with the exception that the other block makes the sprite say something indefinitely.

This block was titled “Say () for () Secs” prior to Scratch 3.0.

Credit: the above section was taken from: https://en.scratch-wiki.info/wiki/Say_()for()Seconds(block). Be sure to follow the link to view additional examples of how this block can be used


Sprite movement

This can be accomplished by using the move or glide blocks

Click here for an example of Move and glide blocks

See more detail here : https://en.scratch-wiki.info/wiki/Motion_Blocks

Updates

27th April 2023: Added “Tutorials using scratch cards” at the top of the note.

© 2021  Vedesh Kungebeharry. All rights reserved. 

© 2022  Vedesh Kungebeharry. All rights reserved. 

How to share a Scratch Project

  1. Login to Scratch.mit.edu
  2. Create and Save your project.
  3. Click on share.
  4. Copy the link and share to your desired place (email, google classroom, etc.)

See the steps in the video below:

© 2021  Vedesh Kungebeharry. All rights reserved. 

Catch by Coordinate – Scratch Game Assignment

The following task was discussed in class today:

Task : Create a game where a sprite moves around a few times to a random position and asks the player (user) to guess his x and y coordinates. If both the x and y coordinates entered by the player are within 10 units of the sprites location, say a message which indicates success, otherwise, say that the player missed and tell the player to try again.

A sample of blocks below shows how to move the sprite around:

Hint

A previously recorded class shows how guessing can be improved to include a range.

https://islandclass.org/2026/05/08/how-to-tolerate-a-guess-withing-a-certain-range-using-the-abs-function-3n-2026-05-08_10-03-41/

Updates to this post

2026-05-08: Added hint section

© 2021  Vedesh Kungebeharry. All rights reserved.