Stop-motion animation is animation created by physically moving real objects a tiny amount between photographs, then playing the photos in sequence so the objects appear to move on their own. Characters are often built around an armature – an internal skeleton – made by wire bending, and covered with materials such as plasticine, foam or fabric. Model building creates the characters, props and sets (miniature scenes) that the animation takes place in.
Stop-motion uses the same principles as drawn animation, especially timing and arcs (see Persistence of Vision, Simple 2D Movement and the Bouncing Ball Timing Exercise). Games have used stop-motion too – several games have been animated with clay or puppets and then digitised.
Materials and tools
- Armature wire: soft aluminium wire (about 1.5–3 mm thick) bends easily and holds its shape. Thicker wire for the spine and legs, thinner for arms and fingers.
- Pliers (round-nose and flat-nose) and wire cutters.
- Plasticine (oil-based clay that does not dry out), foam, aluminium foil and masking tape to bulk out the body.
- Epoxy putty or hot glue (with adult supervision) for rigid parts such as hands and feet plates.
- A camera or phone on a tripod, steady lighting, and a stop-motion app with onion skinning (for example Stop Motion Studio or the free program qStopMotion).
Safety: wire ends are sharp. Cut in a direction away from your face, bend or tape the ends, and have an adult supervise hot glue and cutting tools.
Part 1: Wire bending and armature design
An armature must be strong enough to hold a pose, flexible at the joints and the right proportions for the character. Start by drawing the character at actual size and bending the wire directly over the drawing.
- Draw a front-view template at full size with a simple skeleton: head, spine, hips, shoulders and limbs.
- Make the legs and spine: fold a long piece of wire in half, twist it together to form the spine, and leave two ends for legs. Twisting two strands makes them stronger.
- Add the arms: twist another doubled wire around the upper spine to form the shoulders and arms.
- Make loops for the head and hands; form simple fingers from thinner wire if needed.
- Add feet plates from putty or card, with a way to hold the puppet down – for example a small nut in the foot so it can be screwed to the table (a tie-down), or magnets on a metal base.
- Bulk out the body with foil and tape, keeping joints (elbows, knees, neck) free so they can still bend.

This Howcast video shows how to bend and twist wire to make a simple stop-motion puppet armature:
Part 2: Building models for scenes
- Characters: cover the armature with plasticine or foam and fabric. Keep heads and hands replaceable so you can swap expressions or mouth shapes.
- Sets: build on a firm base board. Use card, foam board, wood, paint and textured materials (sand, moss, fabric). Build only what the camera sees.
- Scale: keep characters, props and sets in the same scale (for example 1:12) so everything fits together.
- Props: small objects from clay, card or 3D prints; glue down anything that should not move.
- Layers: use foreground objects, a midground stage and a painted or printed background for depth, just like 2D environments.

Part 3: Creating simple stop-motion movements
- Lock everything down: tripod fixed, set taped to the table, lights steady (avoid daylight that changes).
- Plan the action with a quick thumbnail storyboard and decide the timing (for example 12 photos per second).
- Move in small steps: move the puppet a few millimetres, take one photo, repeat. Smaller moves = slower, smoother motion.
- Use slow in and slow out: tiny moves at the start and end of an action, bigger moves in the middle.
- Check with onion skinning to compare the new position with the previous frame.
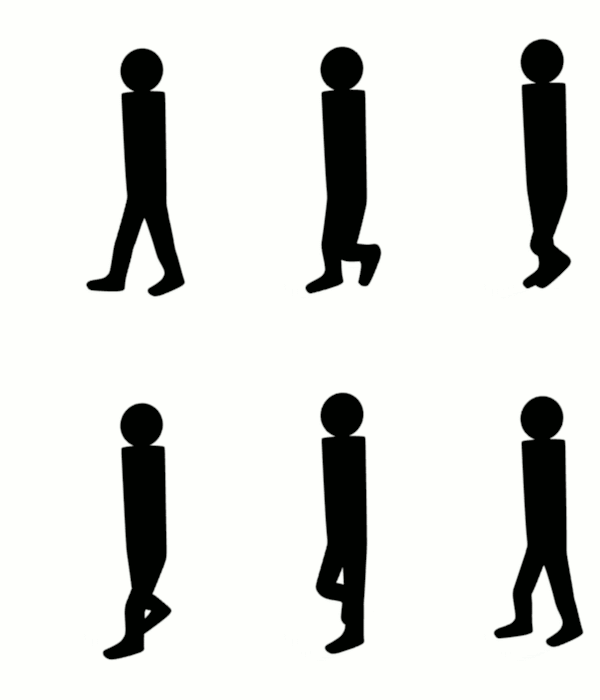
- Start simple: a ball rolling and bouncing, a character waving, then a short walk (4 key poses per step, just like a drawn walk cycle).

Example
A group creates a 10-second stop-motion scene called The Crab and the Coconut. They bend a crab armature from 2 mm aluminium wire (a twisted body loop with eight legs and two claws), bulk it with foil and cover it with orange plasticine. The set is a shoebox beach: sand glued to card, a painted sky background, and a clay coconut. Shooting at 12 frames per second, they animate the crab scuttling sideways (legs moving in alternating pairs), stopping, and struggling to push the coconut – with very small moves as it strains and a big move when the coconut finally rolls. Total: 120 photos.
Exercise
- Design a simple character and draw a full-size armature template for it.
- Build the armature using twisted aluminium wire, with feet that can be fixed down, and test that it holds three different poses.
- Build a small set (a shoebox or foam board) with foreground, midground and background elements at the same scale as your puppet.
- Shoot a 5–10 second stop-motion movement at 12 frames per second, applying slow in and slow out. Share it and describe one thing you would improve.
Next: Back to all lessons – Animation and Game Design Notes (this is the last post in Unit 2, Module 3: Animation for Games).
Syllabus link: This post is relevant to the CAPE® Animation and Game Design Syllabus, Unit 2: Interactive Design and Game Development, Module 3: Animation for Games – Specific Objective 12 (“create simple stop-motion animation movements”); Specific Objective 13 (“build models for scenes within a stop motion animation”).
Attributions to media used in this post:
Steel Animation Hands with Aluminum Wire Fingers – Armature Puppet (2021).jpg – Danylo Maliuha – CC BY-SA 4.0 (via Wikimedia Commons)
Animacion-con-plastilina-y-clay-animation-pelicula-Kuzmich-153.jpg – Max Sviridov – Public domain (via Wikimedia Commons)
Lego sto motion.gif – Gknor – CC BY-SA 4.0 (via Wikimedia Commons)
© 2026 Vedesh Kungebeharry. All rights reserved.