Designing Game Characters for Different Genres: Life Drawing, Skeleton, Muscles and Facial Expressions

Character design for games is the process of creating the look, proportions, movement and personality of the characters players control and meet. To design believable characters for different genres, artists study life drawing (drawing real people from observation), the skeleton (the framework of bones and joints), the muscle system (the muscles that shape and move the body) and facial character theory (how faces show emotion and personality).

Unit 1 introduced shape language and silhouettes in Character Design: Genre, Shape Language and Silhouette and gesture drawing in Motion and Figure Drawing for Animation and Games. This lesson goes under the skin: anatomy knowledge is what lets you exaggerate a character convincingly.

Designing for different genres

GenreTypical proportions and styleWhy
Platformer / familyBig head (2–4 heads tall), large eyes, simple shapes, bright colours.Readable at small sizes; appealing and expressive.
Action-adventureHeroic proportions (7.5–8 heads tall), strong silhouette, clear gear.Looks capable; poses and costume show abilities.
RPGVaried body types and costumes that show class and culture.Players must tell classes and factions apart instantly.
Puzzle / casualVery simple, often non-human mascots.Characters should support, not distract from, the puzzle.
Sports / simulationRealistic proportions and motion.Players expect believable bodies and movement.

1. Life drawing

Life drawing means drawing the human figure from real observation. For school and home practice, draw clothed classmates or family members in short poses, people in public places, athletes on TV, or a wooden artist’s mannequin. Start with quick 30-second to 2-minute gesture drawings to capture movement, then longer drawings to study proportions. A common measuring unit is the head: an average adult is about 7.5 heads tall, the halfway point is near the hips, and the elbows line up with the waist.
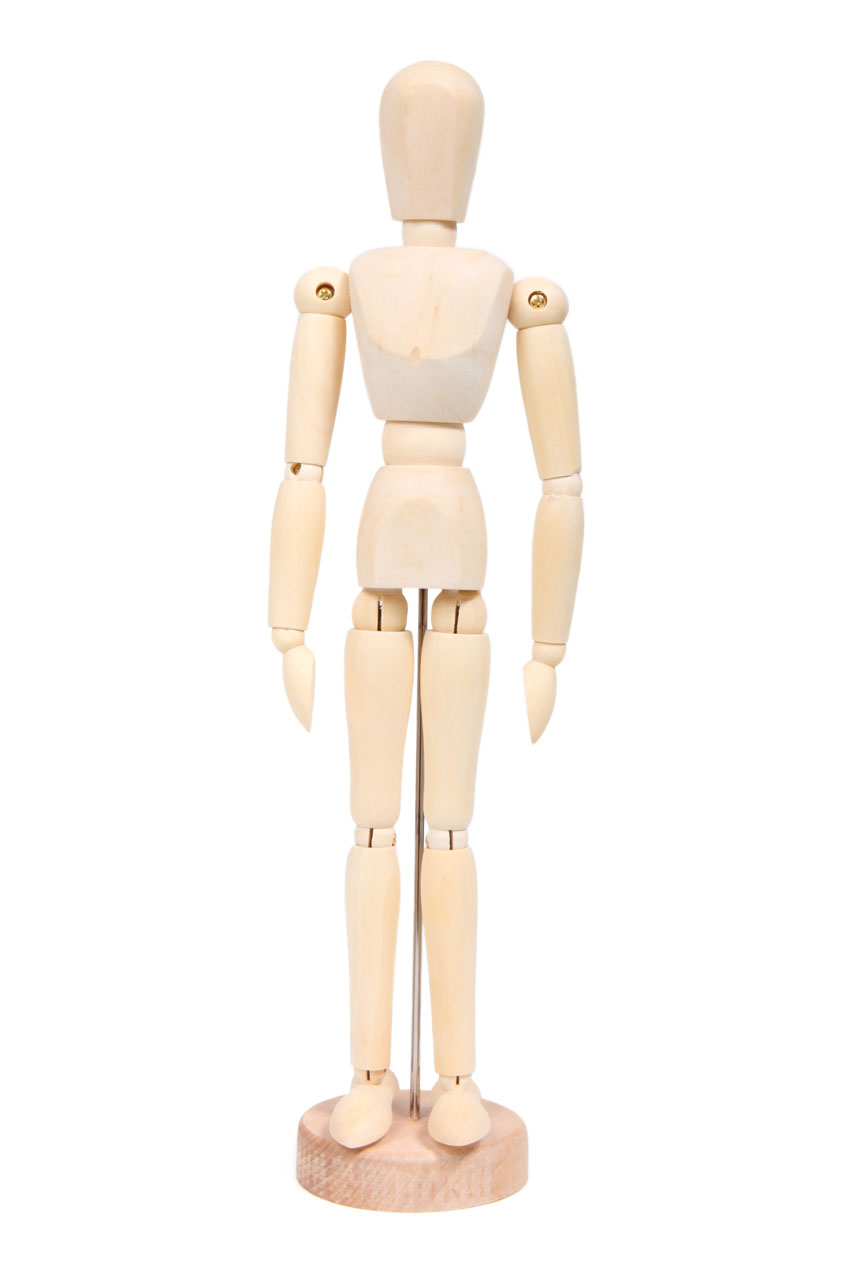
Light wooden artist’s mannequin standing upright
Figure 1 – An artist’s wooden mannequin. Its jointed limbs can be posed to study proportions and the angles of the body. Image: Petr Kratochvil, CC0, via Wikimedia Commons.

2. The skeleton

The skeleton sets proportions and decides where the body can bend. Artists do not need every bone name, but should know the main masses and joints: the skull, rib cage and pelvis (the three big masses), the spine that links them, and the joints at the shoulders, elbows, wrists, hips, knees and ankles. In 3D games, animators build a digital rig – a simplified skeleton of “bones” – inside the character model to move it, so knowing where real joints sit prevents rubbery, unnatural bends.

Historical engraving of two human skeletons seen from the front and the back
Figure 2 – Front and back views of the human skeleton (historical engraving). Notice the three big masses – skull, rib cage and pelvis – linked by the spine. Image: Wellcome Collection, CC BY 4.0, via Wikimedia Commons.

3. The muscle system

Muscles sit over the skeleton and create the body’s surface shapes. Key groups to learn are the shoulders (deltoids), chest (pectorals), upper arms (biceps and triceps), back, stomach (abdominals), thighs (quadriceps and hamstrings) and calves. Muscles contract (shorten and bulge) and stretch as the body moves, which is why a bent arm looks different from a straight one. Game artists exaggerate muscles to show strength (a heavy brawler) or simplify them for a friendly cartoon look.

4. Facial character theory

Facial character theory is the study of how faces communicate emotion and personality. Research by psychologist Paul Ekman suggests that some basic expressions – happiness, sadness, anger, fear, surprise and disgust – are recognised across many cultures. Three zones do most of the work: the eyebrows (the most expressive feature), the eyes and eyelids, and the mouth. Muscles around the eyes and mouth pull these features into each expression.

Medical illustration of the face showing numbered muscles around the forehead, eyes, cheeks and mouth
Figure 3 – Front and side views of the muscles of facial expression. Knowing where these muscles pull helps artists draw believable expressions. Image: CNX Anatomy 2013, CC BY 4.0, via Wikimedia Commons.
Sheet of black-and-white cartoon faces showing different expressions
Figure 4 – A page of cartoon facial expressions from J. Campbell Cory’s 1912 guide The Cartoonist’s Art. Cartoonists exaggerate the eyebrows, eyes and mouth so each emotion reads instantly. Image: J. Campbell Cory, Public domain, via Wikimedia Commons.

Personality shows too: a character who often raises one eyebrow seems sceptical; one with soft, rounded features and wide eyes seems innocent. Designers create an expression sheet showing the character’s key emotions so all artists and animators draw them consistently.

Disney animator Aaron Blaise demonstrates how to draw simple, clear facial expressions:

Example

A student designs the same fisher character for two genres. For a family platformer, she is 3 heads tall with a round body, huge eyes, a bright yellow raincoat and simple muscle shapes; her expression sheet exaggerates joy and surprise. For an action-adventure, she is 7.5 heads tall with realistic proportions based on life drawings of a classmate in a raincoat; the student checks joint positions against a skeleton reference so her rope-throwing pose bends at the right points, and adds defined shoulder and forearm muscles to show years of hauling nets.

Exercise

  1. Do ten 1-minute gesture drawings of clothed people or a wooden mannequin, then one 10-minute drawing measured in head units.
  2. Draw a simplified skeleton (skull, rib cage, pelvis, spine and limb joints) in three action poses.
  3. Draw the same arm straight and bent. Show how the biceps and triceps change shape.
  4. Create an expression sheet for a game character showing the six basic emotions, then redesign the character for a different genre.

Next: Creating Game Environments: Layout, Composition, Colour and Foreground–Midground–Background Layers

Syllabus link: This post is relevant to the CAPE® Animation and Game Design Syllabus, Unit 2: Interactive Design and Game Development, Module 3: Animation for Games – Specific Objective 3 (“employ design skills to create characters for different genres of games”).

Attributions to media used in this post:

Wooden Mannequin.jpg – Petr Kratochvil – CC0 (via Wikimedia Commons)

Human skeleton; front and back views. Coloured line engravin Wellcome V0008004.jpg – Wellcome Collection – CC BY 4.0 (via Wikimedia Commons)

1106 Front and Side Views of the Muscles of Facial Expressions numbered.jpg – CNX Anatomy 2013 – CC BY 4.0 (via Wikimedia Commons)

Facial expressions – The Cartoonist's Art.jpg – J. Campbell Cory – Public domain (via Wikimedia Commons)

© 2026 Vedesh Kungebeharry. All rights reserved.

Motion and Figure Drawing for Animation and Games: Gesture, Anatomy and Character Design

Before a character can move on screen, someone has to draw it moving. Motion drawings are drawings that capture a body in action: walking, jumping, throwing or dancing. Figure drawing is drawing the human (or animal) body, usually from a live model, so that you understand how it is built and how it moves.

In this post we look at the main types of motion drawings and the drawing and design principles animators and game artists use to create believable characters.

Types of motion drawings

1. Gesture drawing

A gesture drawing is a very quick sketch (often 30 seconds to 2 minutes) that captures the action, energy and pose of a figure, not its details. Artists often start with a single curved line of action that runs through the body, then add the head, shoulders, hips and limbs with loose lines. Gesture drawing trains you to see the whole movement first.

2. Dynamic figure drawing

Dynamic figure drawing goes further. The figure is drawn with a clear sense of weight, balance and force, often with twisting, stretching and foreshortening (parts closer to the viewer look bigger). A dynamic pose looks as if it could move at any moment, which is exactly what action scenes and game characters need.

3. Figure in motion

Drawing a figure in motion means drawing a sequence of poses that show how a body changes over time, such as the steps of a walk or a run. Animators call these key poses and in-betweens, and a looping set is called a cycle (for example a walk cycle). The photographer Eadweard Muybridge made famous photo sequences of people and animals moving in the 1870s and 1880s, and artists still study them today.

Animated photo sequence of a man walking beside a boar
Figure 1 – Eight photographs of a man walking with a boar, taken by Eadweard Muybridge (1878–1879), played in a loop. Notice how the arms and legs swing in opposite directions.

4. Humanoid and non-humanoid characters

  • Humanoid characters have a body plan like a human: a head, a body, two arms and two legs. Humans, robots, elves and many cartoon animals that walk upright are humanoid.
  • Non-humanoid characters have a different body plan, for example a dog, a bird, a snake, a dragon, a car or a talking teapot. You need to study how that creature or object moves: four-legged animals, for example, move their legs in a different pattern from people.
Animated photo sequence of a galloping dog
Figure 2 – A galloping dog, from photographs by Eadweard Muybridge (1887). A non-humanoid character needs its own motion study.

Drawing and design principles for characters

Life drawing

Life drawing is drawing from a real, live model rather than from a photo or your imagination. Classmates, family members or even you in a mirror can pose. Life drawing builds your understanding of proportion, weight and balance faster than copying other drawings.

The skeleton

The skeleton is the frame that decides a character’s proportions and how its joints bend. Many artists begin a character with a simple stick figure or “bean and stick” armature: a line for the spine, ovals for the rib cage and hips, and lines for the limbs with dots at the joints. A common guideline is that an adult is about seven to eight heads tall, while cartoon and child characters often have bigger heads compared with their bodies.

Hand-labelled drawing of the bones of the human skeleton
Figure 3 – A labelled drawing of the human skeleton from an 1820s medical book. Knowing where the joints are helps you pose characters correctly.

The muscle system

Muscles sit on top of the skeleton and change the shape (silhouette) of the body. You do not need to learn every muscle, but knowing the big groups – shoulders, chest, arms, back, stomach, thighs and calves – helps you show strength, effort and body type. A muscle that is working usually looks bunched up, while the muscle on the opposite side stretches.

Facial features and expressions

For the face, artists use construction lines: a line down the middle of the head and a line across it. On a realistic adult head the eyes sit roughly halfway down. Moving the eyebrows, eyelids and mouth creates expressions such as happy, angry, surprised or sad, which are vital for acting in animation.

Diagram of facial proportions with guide lines through the eyes, nose and mouth
Figure 4 – Diagram of facial proportions using guide lines, based on the traditional artist’s formula.

Example

Suppose you are designing the hero of a platform game. You might:

  1. Do ten 1-minute gesture drawings of a friend running, jumping and landing.
  2. Choose the best pose and build it on a simple skeleton, keeping the character about four heads tall for a friendly cartoon look.
  3. Add muscles and clothing, then draw a sheet of five facial expressions.
  4. Draw the run as a figure in motion: four to eight poses that loop into a run cycle.

Follow along with the video below, which shows how to use simple stick figures to sketch gesture drawings and dynamic poses:

Exercise

  1. List the four types of motion drawings covered in this post and give one example of when each is useful.
  2. Ask someone to hold five different action poses for one minute each. Do a gesture drawing of each pose, starting with the line of action.
  3. Draw one humanoid and one non-humanoid character. Draw the simple skeleton first for each.
  4. Draw the same face showing three different expressions.

Next: Layers of an Environment and Perspective Drawing: Foreground, Midground, Background and 1-, 2- and 3-Point Perspective

Syllabus link: This post is relevant to the CAPE® Animation and Game Design Syllabus, Unit 1: Fundamentals of Animation and Game Design, Module 2: Drawing and Layout – Specific Objective 1 (“list types of motion drawings”); Specific Objective 2 (“apply drawing and design principles for layout /environment and character development”).

Attributions to media used in this post:

Boar walking.gif – Eadweard Muybridge – Public domain (via Wikimedia Commons)

Dog galloping.gif – Photographs by Eadweard Muybridge; animation by Waugsberg – Public domain (via Wikimedia Commons)

Drawing of the bones forming the skeleton..JPG – Alexander Burnett (National Library of Medicine) – Public domain (via Wikimedia Commons)

Facial proportions re shroud.PNG – TTaylor – CC BY 2.5 (via Wikimedia Commons)

© 2026 Vedesh Kungebeharry. All rights reserved.